PreTreater pro - Basic pretreating procedure
How to correctly pretreat a garment, by choosing the right liquid quantity and selecting precisely the spraying area with the grid or edit mode. Learn how to benefit from the production mode feature and the custom presets.
Pretreater Pro is a pretreatment spraying machine that is equipped with various features that allow the user to personalize his spraying jobs, according to what the customer wants, regarding the final print. In addition, you can save them on the custom presets and this way, reuse them at your convenience, without readjusting the spraying parameters. In order to create and correctly execute its spraying job, you must follow the below procedure:
Select your preferences for the spray area and the liquid amount per ml
-
Step 1: Select the pretreatment liquid you want to use. You can check this, from the Home screen, on the Tanks page or from the Tanks icon, on the bottom right of the Home screen.
-
Step 2: Select the direction you want the garment to have, on the drawer plate. You can rotate it 180o, by pressing the rotate icon.
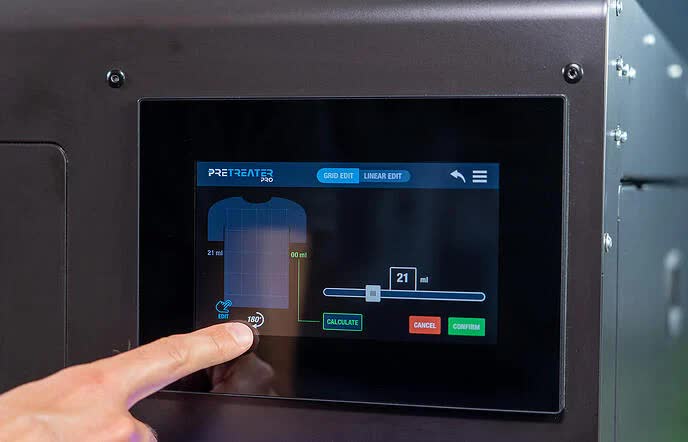
Step 3: Edit the spray area, by tapping on the Edit. There are two spraying selection modes. You can use your preferred method, by switching between Grid Edit and Linear Edit.
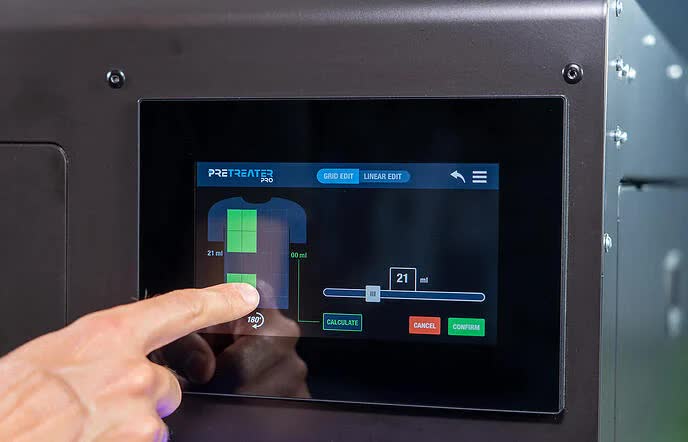
Tap on the Grid Edit button to enable this mode. The entire spray area (41x60cm / 16×23.6in) has been divided into 4 columns and 4 rows (4×4=16 boxes). Specifically, select the boxes in the Grid Box selection area that you want to enable.
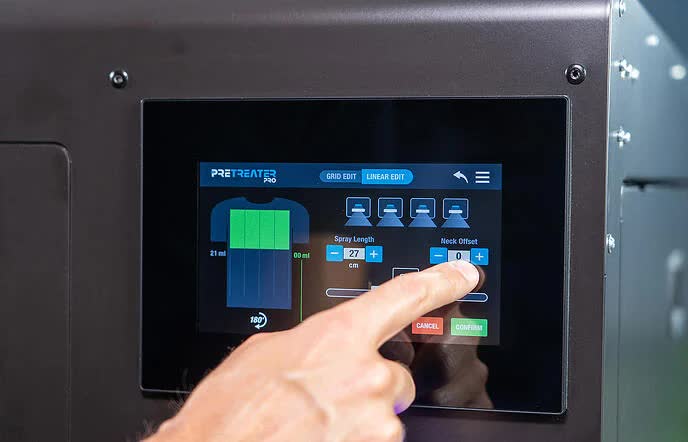
Linear Edit
Tap on the Linear Edit button to enable this mode. Select the nozzles you want. The nozzles spray, exactly as shown on the screen, in the Nozzle Carriage Chamber (e.g., if you select the second nozzle from the left on the screen, the same nozzle will spray in the chamber). Select the Spray Length by changing the value with the +/- buttons. Select the distance from the top, by changing the Neck Offset value with the +/- buttons.
-
Step 4: Select the liquid spraying amount per ml, for the max spray area (41x60cm / 16×23.6in), from the slide bar. Tap on the Calculate button, to check the actual liquid amount sprayed on the selected area. When finished, tap on the Confirm button.
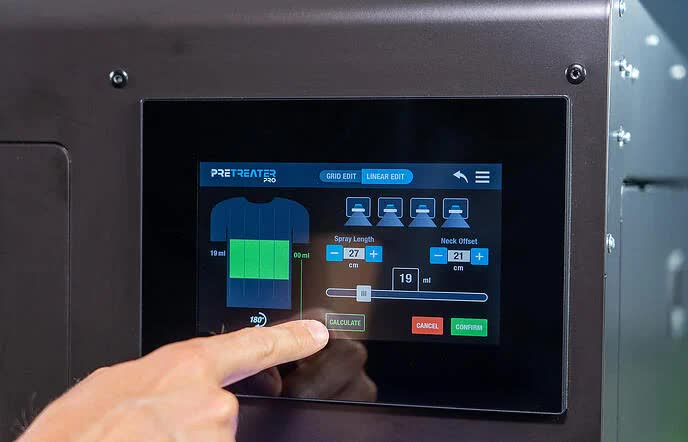
Note: You can save your spraying job, as a custom preset, in one of the ten available slots. For example, if you want to save it in the number one slot, press it and hold it for 3 seconds and your data is saved. Now in the custom presets, by pressing number one, your data is saved.
Garment Loading on Drawer Plate
-
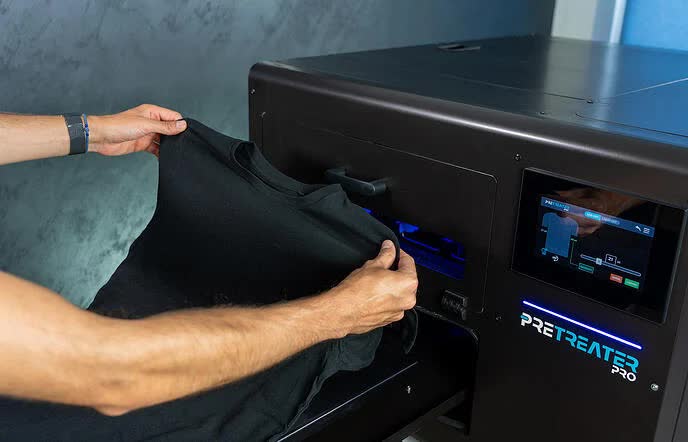
Step 1: Open the drawer and place the garment on the plate, in the direction of the preselected position, as in Step 3 from the “Select your preferences for the spray area and the liquid amount per ml” section.
-
Step 2: Make sure that the garment is flat. Carefully tuck in/position, any excess textile, below the platen. Close the drawer.
Tip: In a humid environment, it is often beneficial to pre-press the shirt (using protection paper as a barrier from the press) for 5 to 10 seconds prior to applying the pretreatment solution. This removes some of the humidity that is naturally trapped in the fibers.
Start Single Step or Production Mode Spraying
-
Step 1: Start Single step or Production mode spraying procedure.
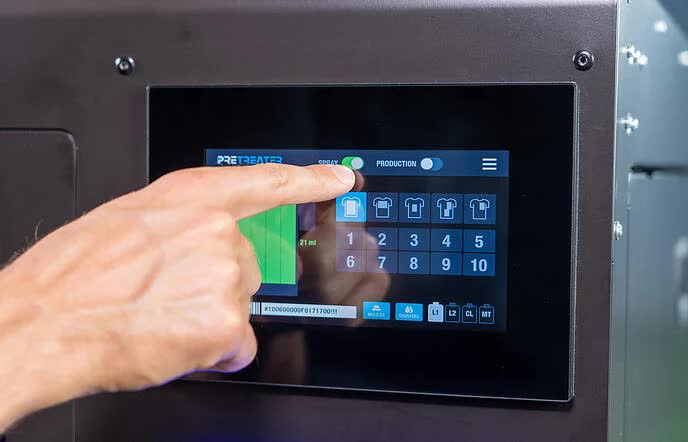
Single Step Spraying. When having a smaller production or working with custom and personalized spraying jobs, this is the mode that we recommend. To spray the garment, either press the Blue button on the front side of PreTreater Pro, or activate the Spray option on the Home screen.
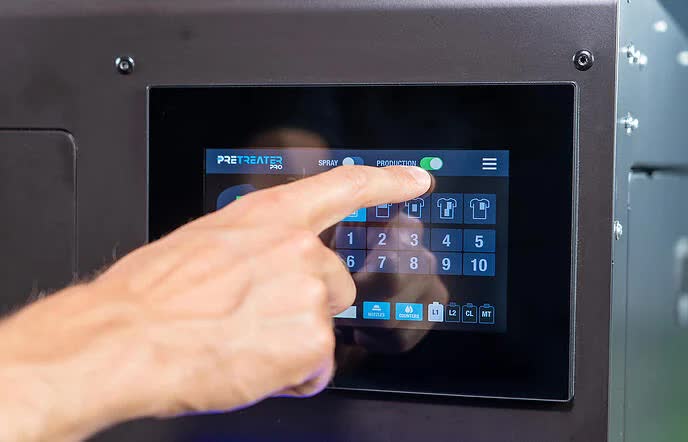
Production Mode. When you have a large production and you are set on the Spray Area and Liquid Quantity; you can take advantage of the Production Toggle button. Production Mode allows you to start the spraying procedure, as soon as- the drawer is closed, without pressing a button. Activate the Production Mode, on the Home screen, to start the automatic spraying function, once the drawer is closed.
Note: If drawer is closed, when enabling the Production Mode, open and close the drawer to start spraying procedure.
Step 2: When spraying finishes, open the drawer and take out the garment. Once you have finished spraying your last garment, before closing the drawer, deactivate the Production Mode on the Home screen.
Tips:
- For best printed image quality, drying the pretreated garment in a heatpress (using the Polyprint protection paper as a barrier from the press) is preferred.
- Dry the pretreated garment in a heatpress, at 160oC for 30 seconds, under high pressure (4-5 bars). The pressure will matte down any fibres, as well as dry the pretreated garment, resulting in a smooth surface, ideal for printing.
