EMT16X Hooping the Garment or Fabric
Video Demonstration:
With the hoop properly adjusted, the garment can be hooped.
-
1. Start with a clean flat working surface. Remove clutter from the area. Do not hoop on an uneven surface or stack of shirts.
-
2. Use an appropriate hoop for your design. For more information, read the section on choosing an appropriate hoop.
-
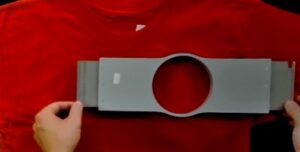
3. Place the properly tensioned outer hoop ring inside the garment.
-
4. Slide the appropriate backing between the outer ring and the hoop.
-
5. Smooth the fabric over the hoop.

-
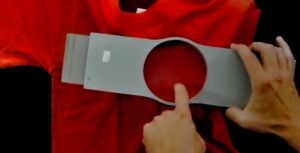
6. Gently align the inner hoop with the outer hoop, sandwiching the backing and a single layer of the garment. The mounting brackets should be facing up. The notch in the mounting bracket will face the machine when the hoop is loaded onto the machine.
-
7. Using the hoop arms as a guide, make sure that the hoop is level to the garment. This will help prevent sewing a design crookedly on a product.
-
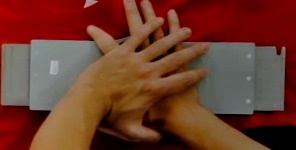
8. Press the hoop down and into place. Take care to press on the ring rather than on the arms. Pressing on the arms can bend the hoop out of shape or break it.
• It may be helpful to start by placing one hand just below and off of the outer hoop to stabilize and smooth the fabric.
• Try to hoop in a smooth motion. If the hoop rocks back and forth, extra material will move into the hoop and diminish the quality of the embroidery.
• Do not overstretch the material. Stretching the material will stretch and distort the sew-out. It can also lead to puckering.
-
9. Once the material has been hooped, make sure that the garment is smooth, flat, and taut. If the garment is loose, you may need to remove the hoop and adjust the hoop tension or hooping method.
-
10. Check the back of the hooped piece. Make sure that there are not wrinkles or other parts of the garment lodged in the hoop.
-
11. As a final step, check the hoop for placement accuracy and straightness.


Hooping Tips
Round hoops give the most even tension of all the hoop shapes. Wooden hoops will have registration marks on them. These help maintain the shape and hold of the hoop. Many wooden hoops are double-high, meaning their sides are twice as tall as normal hoops. They help grip slick or bulky goods because of the larger surface area and slight tooth the wood provides.
Choose the smallest hoop that the design will fit in without going over the hoop limitations. Adjust the hoop tension before hooping the final garment. If you adjust the tension of the hoop while the garment is in it, you will increase your chances of “hoop burn” and create ripples in the garment.
Sew a Swatch!
It is often a good idea to sew a practice piece on material as similar to the final product as possible. Although not essential, producing a sample is an excellent way to prevent or solve potential problems before embroidering the final product.
Working With Different Fabrics
Different fabrics and fabric weights may require you to loosen or tighten the hoop. It might take a few attempts to get the exact setting for the fabric you are working with. Most fabrics do not require the hoop to be tightened down once in the hoop.
