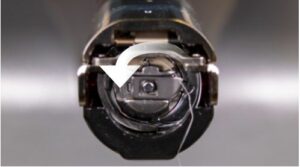
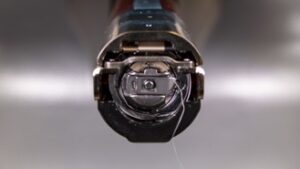
EMT16X Bobbin threading and tension
Video Demonstration:
The proper bobbin tension and installation also play an integral role in the quality and efficiency of an embroidery sewout.
What type of Bobbin?
For the best results with your machine, use Style L continuous polyester filament bobbins.
Removing the Bobbin Case
CAUTION: Never attempt to remove or insert the bobbin while the machine is in operation
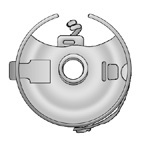
The bobbin case can be removed from the lower arm of the machine by locating the release lever on the bobbin case. Pull forward on this lever until the case is free from the machine. Remove the old bobbin from the case.
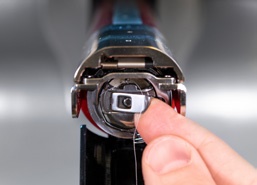
Cleaning the Bobbin Case
It is recommended that you clean under the tension spring of your machine bobbin case every time you change the bobbin. Lint and bobbin wax can build up under the spring, and this can affect bobbin tension. This, in turn, will have an impact on sew quality (loose bobbin, bobbin showing on front side of sew out, thread breaks, false thread breaks). To clean under the spring, slide a corner of a small piece of paper under the tension spring in the same direction the thread travels. While cleaning under the tension spring, be careful not to bend the spring. After cleaning the bobbin case, blow the case out with compressed air. It is also recommended that you check the bobbin tension.
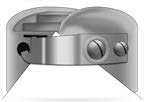
Inserting a New Bobbin in the Bobbin Case & Checking the Tension
-
1. Hold the bobbin case with the front facing down and the open end facing up.
-
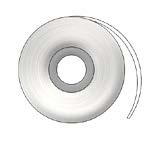
2. Hold the new bobbin with the thread coming over the top and to the right in a
clockwise fashion. It should look like a number nine (9). -
3. Without flipping the bobbin, drop it into the bobbin case.
-
4. Route the thread through the thin slot opening and under the tension spring. The bobbin thread should no be releasing from the side of the case.
-
5. To check the tension of the bobbin, hold the bobbin thread with one hand. As you gently bounce the thread, the bobbin case should drop.
• For EMT16X, XTS, and XT: It should drop 1”-2” or 2.5 – 5cm.
• For EMT16 and EMT16 PLUS: At most, it should drop a half inch / 13 mm.a. To place the handle, align the angled edge to the t-channel in the leg of the machine base.
b. Rock forward and lift slightly up on the handle to rotate it into place
-
6. If the tension is incorrect, use a flat-blade screwdriver to turn the larger adjustment screw clockwise to tighten or counterclockwise to loosen the tension.
This test must be completed BEFORE winding the thread through the pigtail
- 7. Once the tension is set, wind the thread through the pigtail.
For a more accurate test of the bobbin tension, use a bobbin tension gauge.
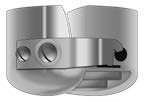
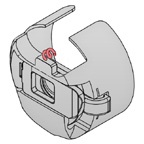
Bobbin Case Tension Gauge Overview
-
1. Indicator
-
2. Second Pulley
-
3. First Pulley
-
4. Bobbin Case Set Position.
-
5. Thread Cutter
-
6. Thread Take Up
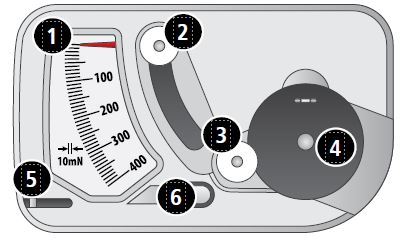
Using the Guage
-
1. Clean and thread the bobbin case as you normally would.
-
2. Pull the thread through the tension spring, but do not pull the thread through the pigtail.
-
3. Insert the threaded bobbin case into the tension gauge with the extended portion of the latch falling into the guide as shown in red.
-
4. Route the thread through the two pulleys and the take up as shown in red.
- 5. Pull the thread gently and smoothly in the direction of the arrow at a rate of approximately an inch per second. Doing this will cause the second pulley to move down and with it, the gauge indicator. Watch as you pull for where the indicator is when the bobbin is starting to turn.
• For EMT16X, XTS, and XT: The ideal setting for bobbin
tension for embroidery is between 150 and 190.
• For EMT16 and EMT16 PLUS: The ideal setting for bobbin
tension for embroidery is between 180 and 220.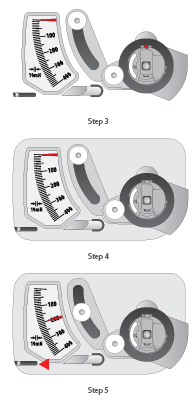
Adjusting Bobbin Tension
-
1. To adjust the tension, access the adjustment screw (larger of the two) on the tension spring from the recessed corner of the gauge.
- 2. . Using a small flat blade screw driver, turn the adjustment screw in small increments between testing. Small rotations can make large adjustments to the tension.
• Clockwise: This increases the tension on the bobbin thread.
• Counter Clockwise: This decreases the tension on the bobbin thread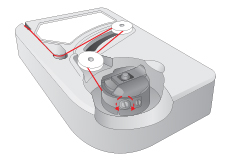
Other Instructions
-
-
Note: Extra thread may be trimmed away using the thread cutter located below the indicator.
CAUTION: This device is a precise measuring apparatus that has been carefully tested and adjusted. Do not drop, hit against another body, or disassemble it.
Avoid gauge contact with thinner oil, benzine oil, alcohol, and/or petroleum.

Inserting the Bobbin Case
CAUTION: Never attempt to remove or insert the bobbin while the machine is in operation.
-
1. Insert the bobbin and case in the machine with the pigtail facing up. Push on the bobbin case until it snaps into place.
-
3. Trim the thread to 2 – 3 inches.
-
2. Test the bobbin orientation by pulling on the thread. The bobbin should rotate counter-clockwise.
NOTE: If the thread is cut too short, it will not pick up on the stitch. If the thread is left too long, it may wrap into the machine.
