EMT16X 30 Million stitch maintenance
Video Demonstration:
Please follow all of the maintenance procedures carefully and apply the proper amounts of the specified lubrication during each step.
Melco cannot be held responsible for any machine damage due to lack of or wrong type of lubrication. Melco cannot be held responsible for any machine damage due to not following the listed maintenance steps.
You will now be guided through the 30,000,000 stitch maintenance procedure covering the following:
– Take-Up Lever Cam, Presser Foot Cam Follower, & Right Needle
Bar Guide
– Presser Foot Cam & Left Needle Bar Guide
Press the next button to continue.

WARNING!
If you currently have a hoop or clamping system on the machine, please remove it.
Failure to fully remove a clamping system can result in damage to
the machine. When you press on the next button, the machine will move to the
appropriate position.
Press the next button to continue.

Loosen Right Upper Arm Front Cover
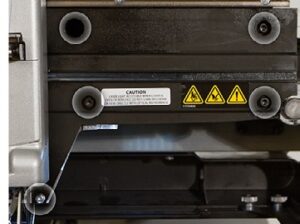
Using a 3mm and a 2.5mm Allen wrench, loosen and remove the five (5) screws shown in the image.
Press the next button to continue.
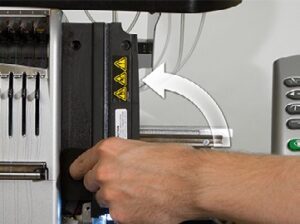
Remove Right Upper Arm Front Cover
After removing the mounting screws, move the right upper arm front cover slightly away from the machine. Then, rotate it counterclockwise as shown in the image and remove it completely from the machine.
When you click the next button the machine will move to the appropriate position for the maintenance.
Press the next button to continue.
Grease Take-Up Lever Cam
Using the grease applicator, apply some HP grease to the back surface of the take-up Lever Cam as shown in the image.
Press the next button to continue.
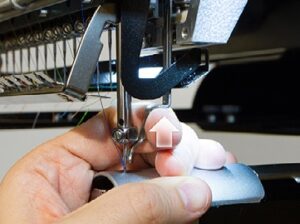
Lift Presser Foot
To gain access to the next maintenance point, the presser foot must be manually raised. Place a finger below the backbend of the presser foot and lift the presser foot as shown in the image. Press the next button to continue.
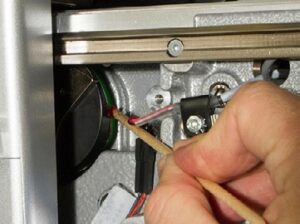
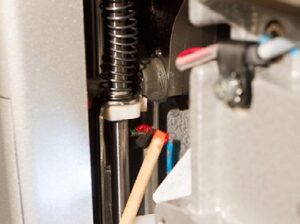
Grease Upper Presser Foot Cam Follower
Using the grease applicator, apply a small amount of the HP grease
to the upper presser foot cam follower. Press the next button to continue.
Reinstall Right Upper Arm Front Cover
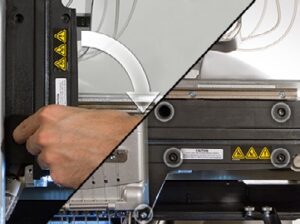
Position the right upper arm front cover in its original location. You will need to rotate it back into place in the reverse of the way it was removed.
Reinstall the five (5) mounting screws to hold the cover in place. It is important to leave them just loose enough that the cover can still move, but make sure that the screws are in far enough that they will not catch the needlecase as it moves over them. The screws will be fully tightened in a future step.
Important: Ensure that the button head screw is installed in the
lower left side location of the cover as shown in the image.
Press the next button to continue.
WARNING!
If you proceed without mounting the right upper arm front cover, damage to your machine will occur and a service call will be necessary.
Note: Melco will not be responsible for any damage to the machine or related service costs caused by not performing this step. When you click the next button, the needlecase will move to the next maintenance position.
Click the next button to confirm that you installed the right upper
arm front cover and continue.
Tighten Screws
With the needlecase holding the right upper arm cover in the appropriate position, tighten the two screws in the right side of the upper arm front cover as shown in the image. When you click the next button, the needlecase will move to the next maintenance position.
Press the next button to continue.
Tighten Remaining Screws
Now tighten the three remaining screws on the left side of the right upper arm front cover as shown in the image.
Press the next button to continue.
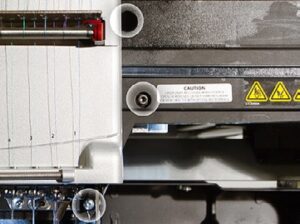
Tighten Remaining Screws
Now tighten the three remaining screws on the left side of the right upper arm front cover as shown in the image.
Press the next button to continue.

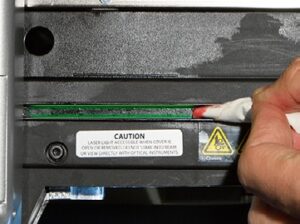
Clean and Grease Guide
With a clean piece of cloth, wipe clean the needle bar guide channel indicated in the image. The image uses cloth wrapped around the grease applicator for better control of the cloth. With a clean piece of cloth, apply a thin film of HP grease to the inside of the channel as shown in the image.
When you click the next button, the machine will advance to the next maintenance position.
Press the next button to continue.
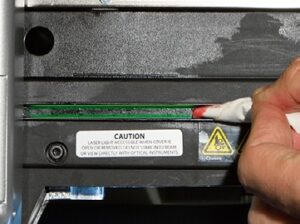
Loosen Left Upper Arm Front Cover
Using a 3mm Allen wrench, loosen and remove the four (4) screws shown in the image. Press the next button to continue.
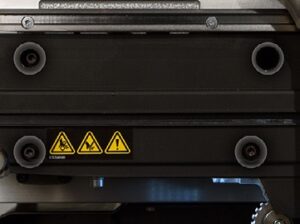
Remove Left Upper Arm Front Cover
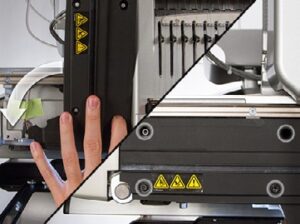
After removing the mounting screws, move the left upper arm front cover slightly away from the machine. Then, rotate it clockwise as shown in the image and remove it completely from the machine.
Press the next button to continue.
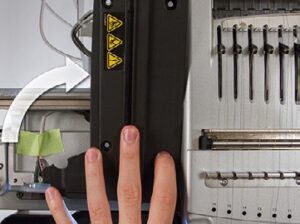
Grease Presser Foot Cam
Locate the presser foot cam as shown in the image. With the grease applicator, apply a small amount of HP grease spread fairly evenly along the entire fight side of the presser foot cam as shown in the image.
Press the next button to continue
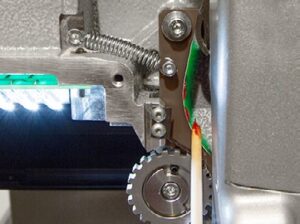
Reinstall Left Upper Arm Front Cover
Position the left upper arm front cover in its original location. You will need to rotate it back into place in the reverse of the way it was removed.
Reinstall the four (4) mounting screws to hold the cover in place. It is important to leave them just loose enough that the cover can still move, but make sure that the screws are in far enough that they will not catch the needlecase as it moves over them.
The screws will be fully tightened in a future step.
Press the next button to continue.
WARNING!
If you proceed without mounting the left upper arm front cover, damage to your machine will occur and a service call will be necessary.
Note: Melco will not be responsible for any damage to the machine or related service costs caused by not performing this step.
When you click the next button, the needlecase will move to the next maintenance position. Click the next button to confirm that you installed the right upper arm front cover and continue.
Tighten Screws
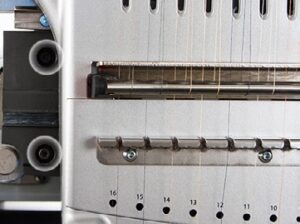
With the needlecase holding the left upper arm cover in the appropriate position, tighten the two screws in the left side of the upper arm front cover as shown in the image. When you click the next button, the needlecase will move to the next maintenance position.
Press the next button to continue.
Tighten Remaining Screws
Now tighten the two (2) remaining screws on the right side of the left upper arm front cover as shown in the image.
Press the next button to continue.
Clean and Grease Guide
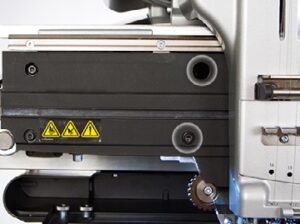
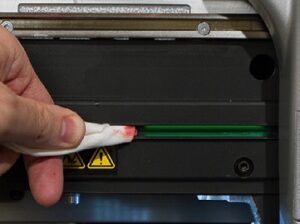
With a clean piece of cloth, wipe clean the needle bar guide channel indicated in the image. The image uses cloth wrapped around the grease applicator for better control of the cloth. With a clean piece of cloth, apply a thin film of HP grease to the inside of the channel as shown in the image.
When you click the next button, the machine will advance to the
next maintenance position.
Press the next button to continue.
Finished!
This completes the 30,000,000 stitch maintenance procedure.
Press the finish button to exit the maintenance procedure.

