
- Entering Maintenance Mode
- Cleaning the Capping Station
- Cleaning the Wiper
- Cleaning around the Print Head
- Selecting Daily Maintenance
At the end of each printing day, an exact Maintenance routine must be followed in order to ensure the smooth operation of the printer. During production, the printer builds up ink residue and sometimes fibres can gather after multiple prints.
- The parts that need to be maintained and cleaned frequently include the capping station, wiper and printhead.
-
Entering Maintenance Mode
The Daily Maintenance procedure should be performed at the end of each production day, after the printing is finished in order to clean those specific parts and ensure that they operate properly for future use.
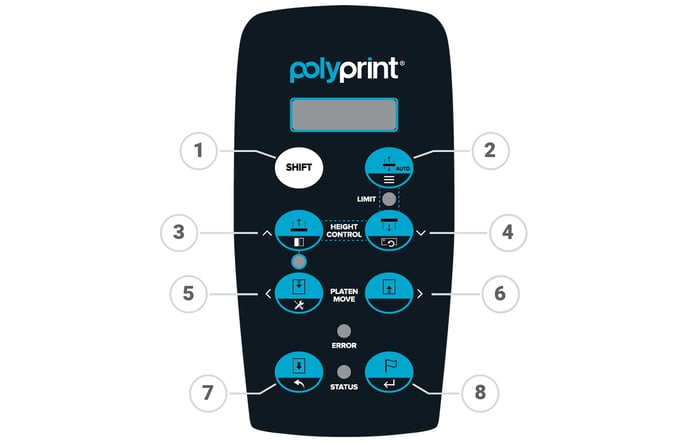
- When entering Maintenance mode, written instructions will appear on the Platen Control Panel that will give you guidance on how to correctly perform the Daily Maintenance procedure.
Procedure:
- Press Shift (1) + Move Platen Out (5) at the Platen Control panel, to enter Maintenance Mode.
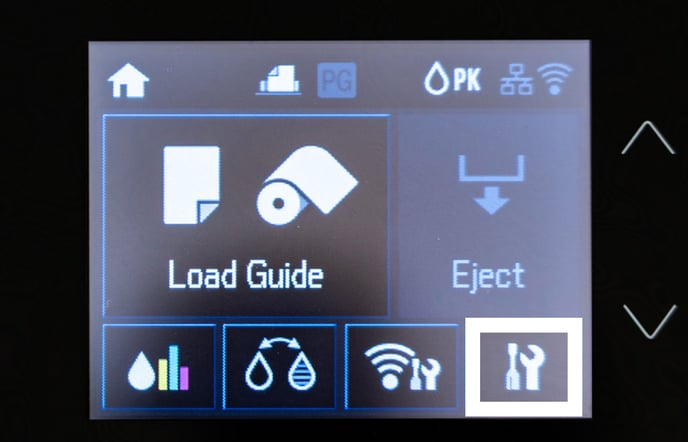
- Follow the instructions that will appear at the Platen Control panel. Tap on the Service button at the Printhead Control panel. Choose Maintenance, Print Head Cleaning and Head Cleaning.
- Wait for the Printhead Control panel to turn off.
- The printhead should then be unlocked. Push it away from the capping station in order to clean both parts.
- Make sure the printhead is not unlocked for more than 5-10 minutes.
-
Cleaning the capping station
Removing any built-up or dried ink surrounding the capping station will help to improve the seal between the printhead and the capping station.
Using a swab and cleaning solution, clean the rubber surroundings of the Capping Station including the sides and the lip around the top of the caps.
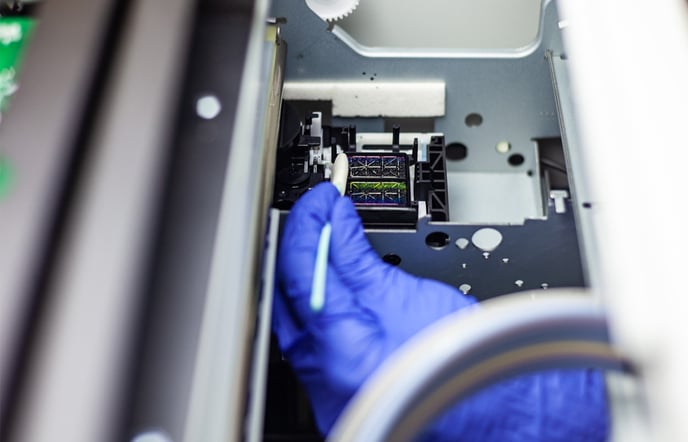
After completing the cleaning of the rubber surroundings, fill the capping station with cleaning solution.
-
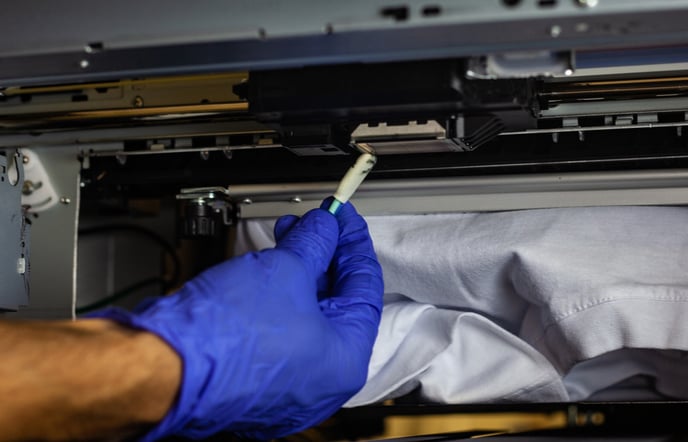
Cleaning the wiper
- From the right side of the printer, turn the gear anticlockwise to release the wiper.
Using a swab and cleaning solution, clean both sides of the wiper blade. A build-up of old ink on the wiper blade can make it look like there’s a green glow, the wiper blade should look an opaque black/ almost brand new once cleaned.

-
Cleaning around the Print head
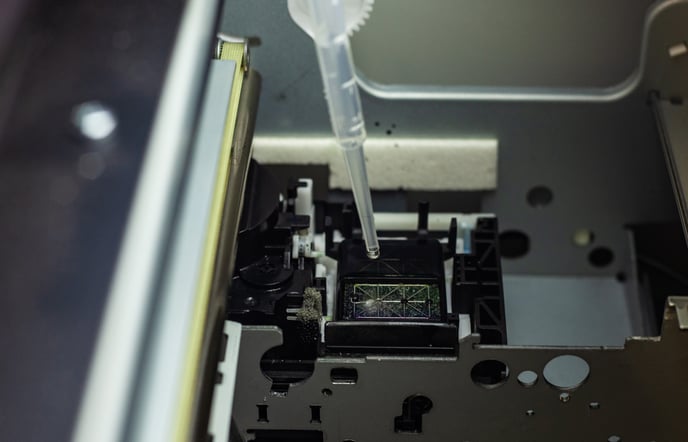
On the underside of the Printhead clean the grey bars either side of the mirrored surface, using a cleaning swab and cleaning liquid. Removing any clumps of dried ink.
Do not touch the mirrored surface whilst performing the maintenance.
-
Selecting Daily Maintenance
After completing the cleaning of all three parts, turn the gear, at the side of the printer clockwise until the wiper fits inside.
Move the Printhead back to it's home position above the capping station and continue turning the gear clockwise until its locked.
Tip: If you're not sure whether the Printhead is locked, try gently moving it away from the Capping Station. If it moves easily, it means the Printhead is not locked. In that case, push the Printhead back to it's home position above the Capping Station and repeat the process of turning the gear clockwise until it locks into place.
Press the home button to continue.
Press Shift (1) + Move Platen Out (5) at the Platen Control Panel, to exit Maintenance Mode.
Wait for the printer to reboot.
Bypass the Notice screens.
When Printhead Control panel goes to Home screen, select at Platen Control Panel the Maintenance mode you would like to perform.
For Daily Maintenance select option 1 and press the Home button. Wait for the printer to lock the head electronically and turn off.